Decorative Mouldings and Garden Furniture
All WoodUbend products are heat-bendable decorative wood mouldings. When you heat WoodUbend mouldings with a heat gun or hair dryer they become bendy and all the decor mouldings, once heated, can be shaped to fit any surface. WoodUbend mouldings have all the properties of wood and can be Drilled…Sanded…Glued…Painted…Stained…Varnished…Waxed or Distressed!
The good thing is we at Homes N Living have stocked up on beautiful wood moulding designs for you to choose from!
When you think of WoodUbend decorative mouldings, upcycled furniture, crafting and even interior decor springs to mind. Did you know, that if properly sealed then WoodUbend can be used for external projects? So for your garden furniture projects, you don’t need to look any further than WoodUbend and Posh Chalk.
Today we will be sharing with you the creation of very ornate piece of garden decor by Wayne Perry and Woodubend.
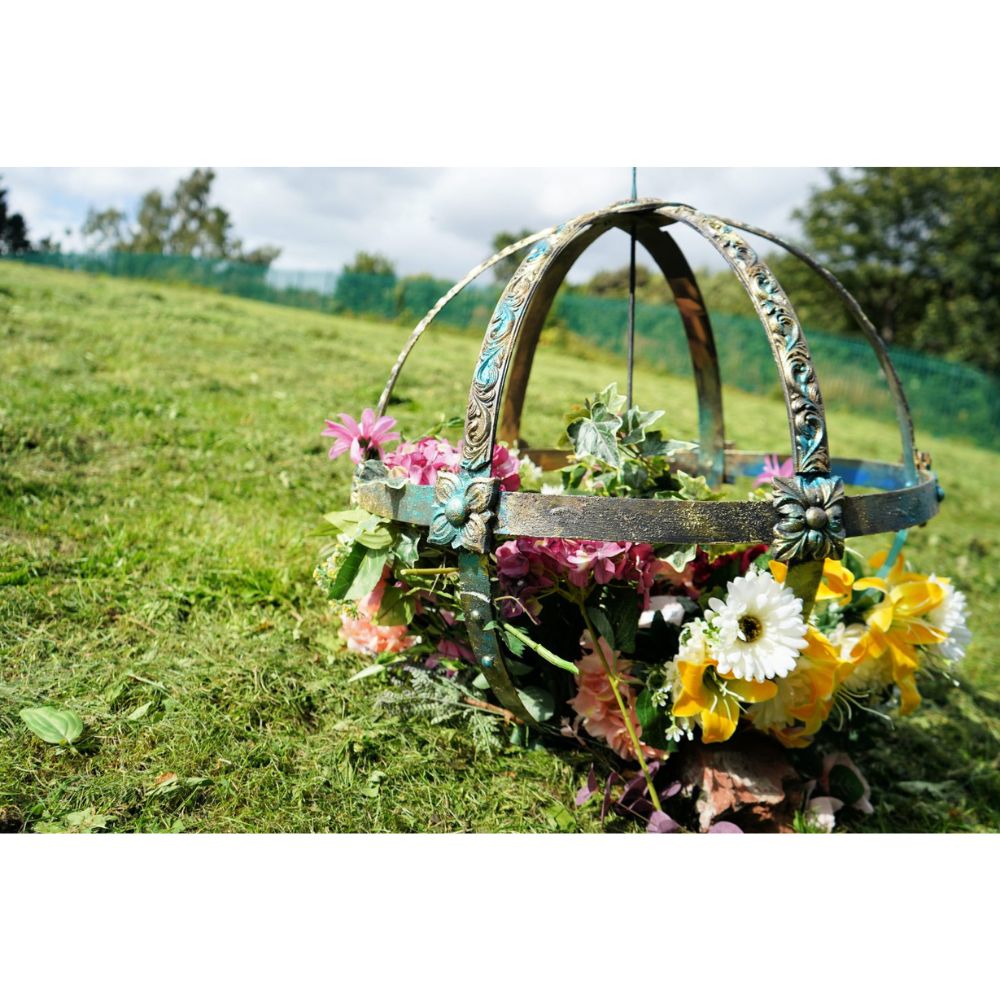
This is an an armillary sphere inspired design. For those of you who don’t know, an armillary sphere is an old instrument used to represent the movement of celestial bodies around the earth.
In this design barrel hoops are cambered, if you think about the shape of a barrel it’s not straight up and down, rather it is thinner at the bottom and top than it is in the middle; as such the hoops are made on an angle so they sit right. With this in mind, the first step was to arrange all the hoops correctly, so the smaller one sat in the middle with the bigger ones on the outside, then intersect the rings and create ‘pizza slices’ putting a little dot at each intersection. This dot marks where to drill through the metal.
Using a long metal bar, Wayne thread it through two sets of opposing holes, screwed on a decorative cake top and tightened it up with a nut at the bottom. We now had the top and bottom or our ornamental garden furniture.
Next up, sphere was opened and passed the largest hoop over the top, lined up the pre-drilled holes and joined the whole thing together with a rivet gun.
A hole was drilled through the middle of a Woodubend centrepiece design (1384 used here). With the hole through the top of the centrepiece moulding, the decorative top is popped on the sphere and threaded the metal bar through the hole before screwing the topper back on. As the moulding was effectively screwed into place, there was no glue needed to secure it, just a bit of heat to mould it to the shape of the garden ornament.
As Posh Chalk products are flexible they can be used to pre-paint your WoodUbend mouldings before heating and bending. So, it was on with the Black Carbon Smooth Metallic Paste, even though the ornament would live outside, there was no need to seal the moulding afterwards; like the Patinas, the Posh Chalk Pastes are an all-in-one product.
Around the sides were incorporated with the floral centrepieces (2158 & 1458 used here) for good measure. These decorative mouldings were placed at each intersection. One of the fantastic things about WoodUbend is the fact that they can be adhered to any surface quickly and easily with the application of a little heat and some good quality wood glue.
Whether you’re applying to wood, leather, glass, stone, plastic the process remains the same, heat them, apply wood glue and press them onto the surface.
As the trims were long, when heated it was deemed best to keep them in their coil. Keeping the trims in the coil ensures that the heat and therefore the flexibility is retained longer, but also you don’t have long, unruly lengths of WoodUbend everywhere; just uncoil what you need. Next up, it’s far easier to apply the wood glue to the surface you’re using, as opposed to the back of the trim.


Once the Textured Pastes had been sufficiently dabbed and dobbed onto the surface, it was time to bust out a bit of bling! Pale Gold Posh Chalk Pigments were mixed, again when mixed with the new-style Posh Chalk Infusor, the Pigments are more than at home outdoors. Keeping a little bit of a light touch with the Pigments, using them to highlight the texture which had been built up as well as the details of the decorative mouldings.
Once the Pigments were on, it was time to create some verdigris using the Green Fhthalo and Blue Prussian Metallic pastes, this time of the smooth variety. As all the pastes are water based, they can quite easily be mixed together, so that’s what was done – creating a lovely verdigris. Using the perfect dabbing and dobbing technique parts of the designs were picked out in the weathered green colour.
Once it was on the surface, it was spritzed with water bottle in order to thin the mixture out a little so it would run down the decorative mouldings, giving a truly organic weathered feel!